Automatic Cat Feeder

This project has been in the works for a looong time. But after several rounds of prototypes, and a from scratch redesign, I finally have a working cat feeder!
Materials
- Servo motor
- Cereal dispenser
- Food bowl
- Relay
- Belt
- Screws
- Barrel connectors
- 5v2a power adapter
- ESP32 board (I used the ESP32-C3-Devkit-M1)
- 3 inch diameter 45 degree PVC/ABS pipe
- Wires, breadboard
- 3d printed parts
- Optional: LED and resistor
The design of this cat feeder is fairly simple. A servo motor turns a belt, which turns the knob of a cereal dispenser to dispense the food. It is powered by a ESP32 microcontroller connected to home assistant.
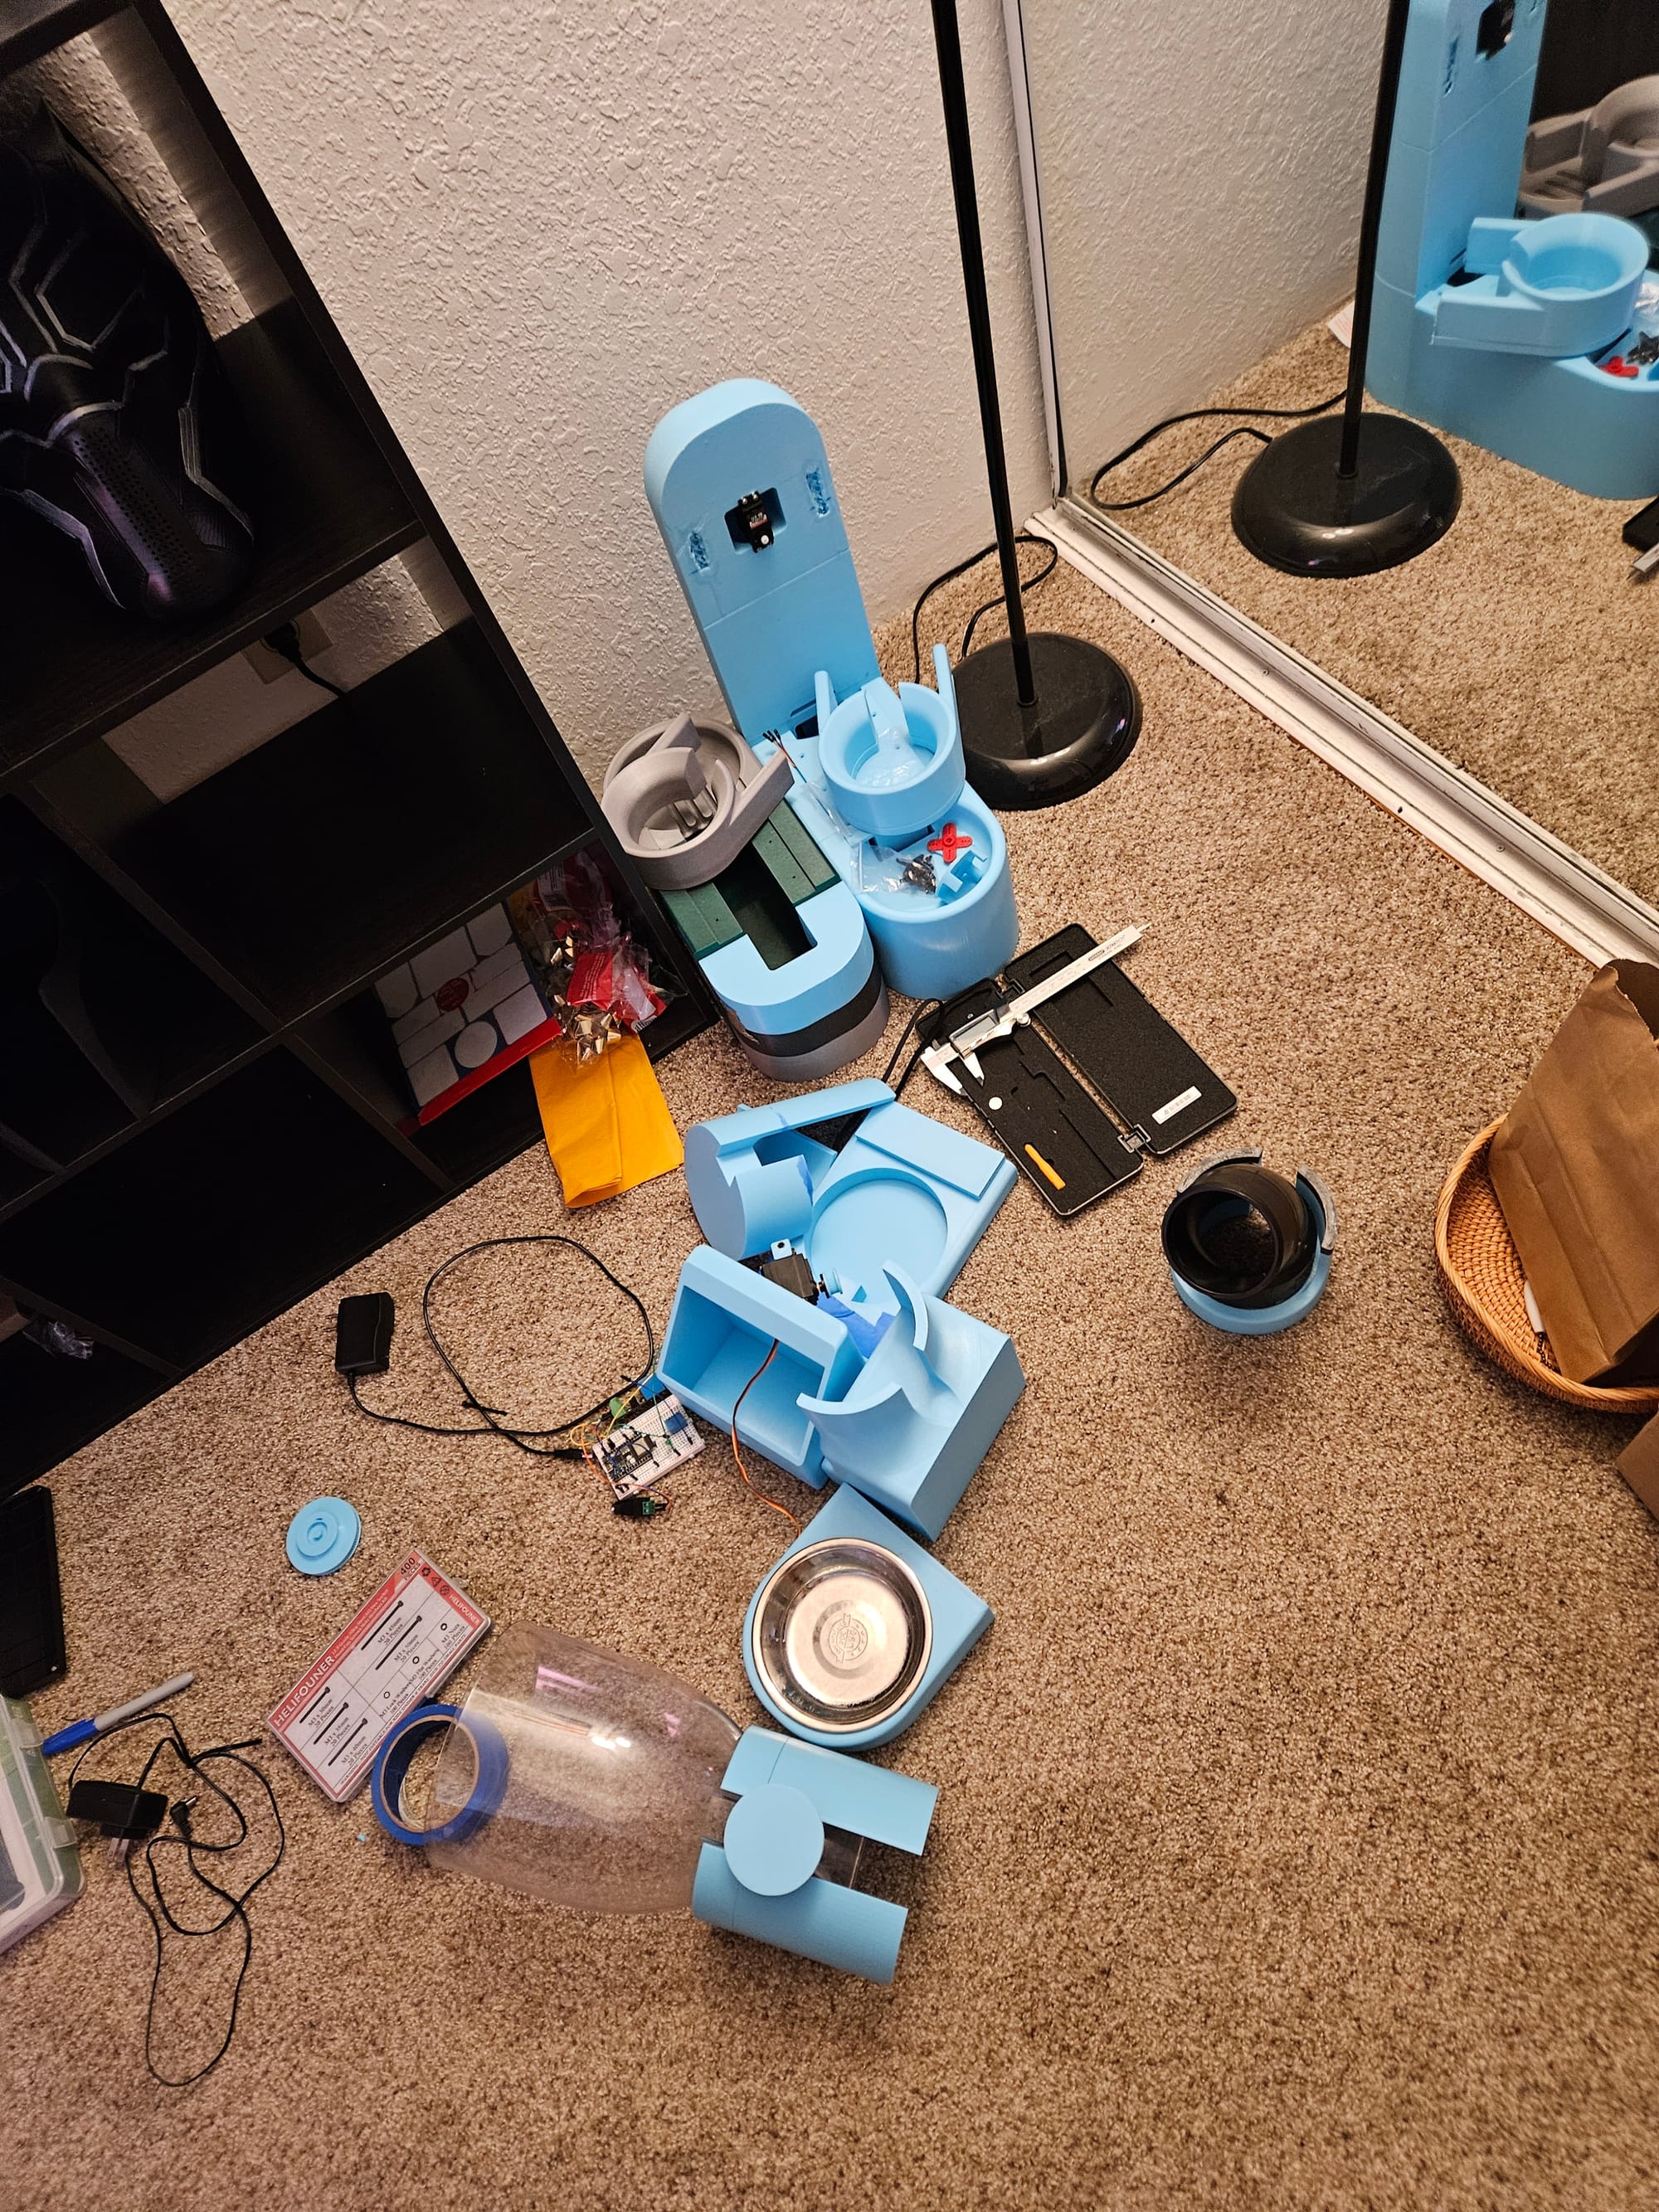
- First, 3d print all the parts
https://www.thingiverse.com/thing:6892463
or
https://www.printables.com/model/1165695-automatic-cat-feeder
Each piece needs to be printed once, except the "servo mount", which you need 2 of.
- Assemble the parts
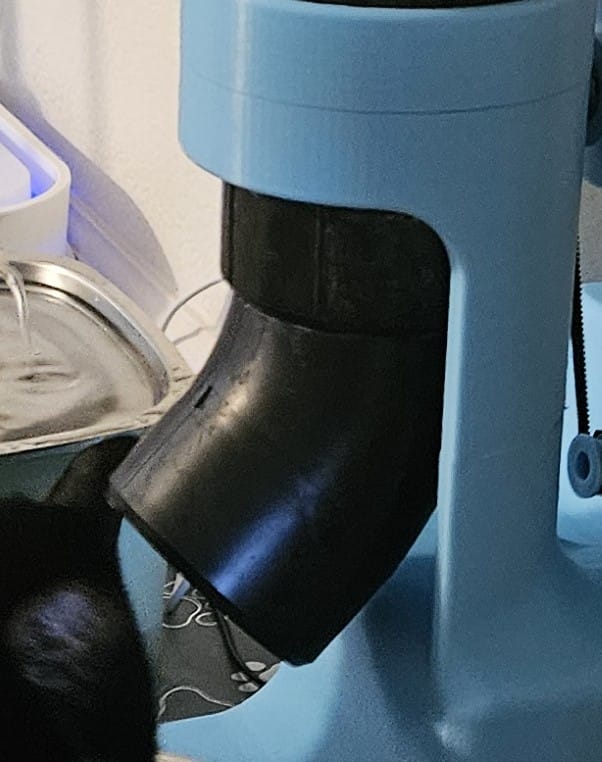
The pipe needs to be glued to the printed body as pictured.
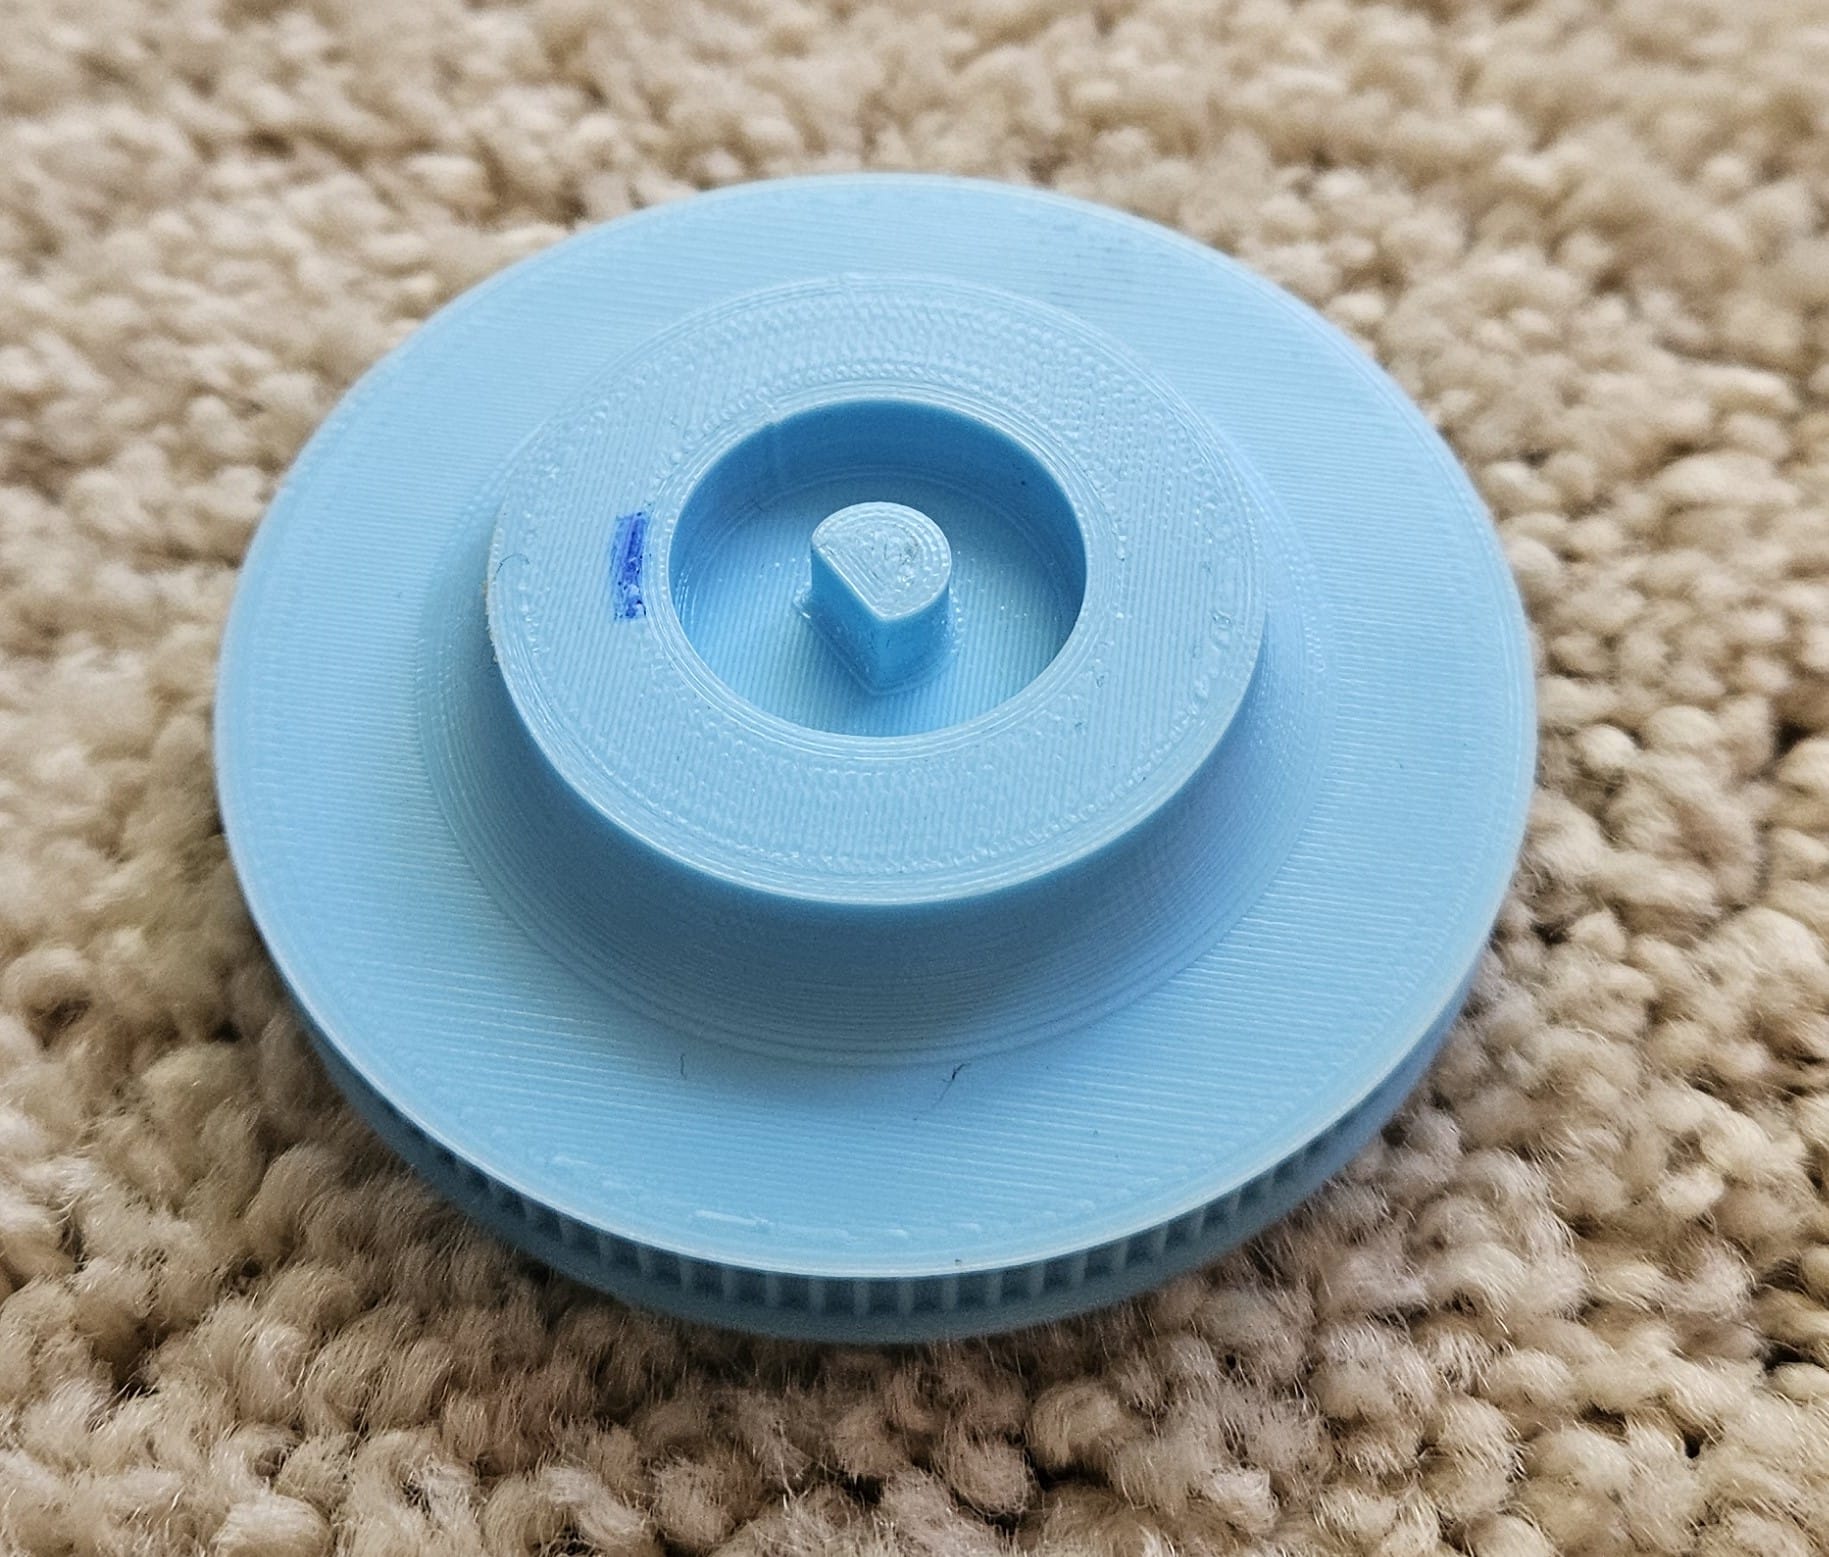
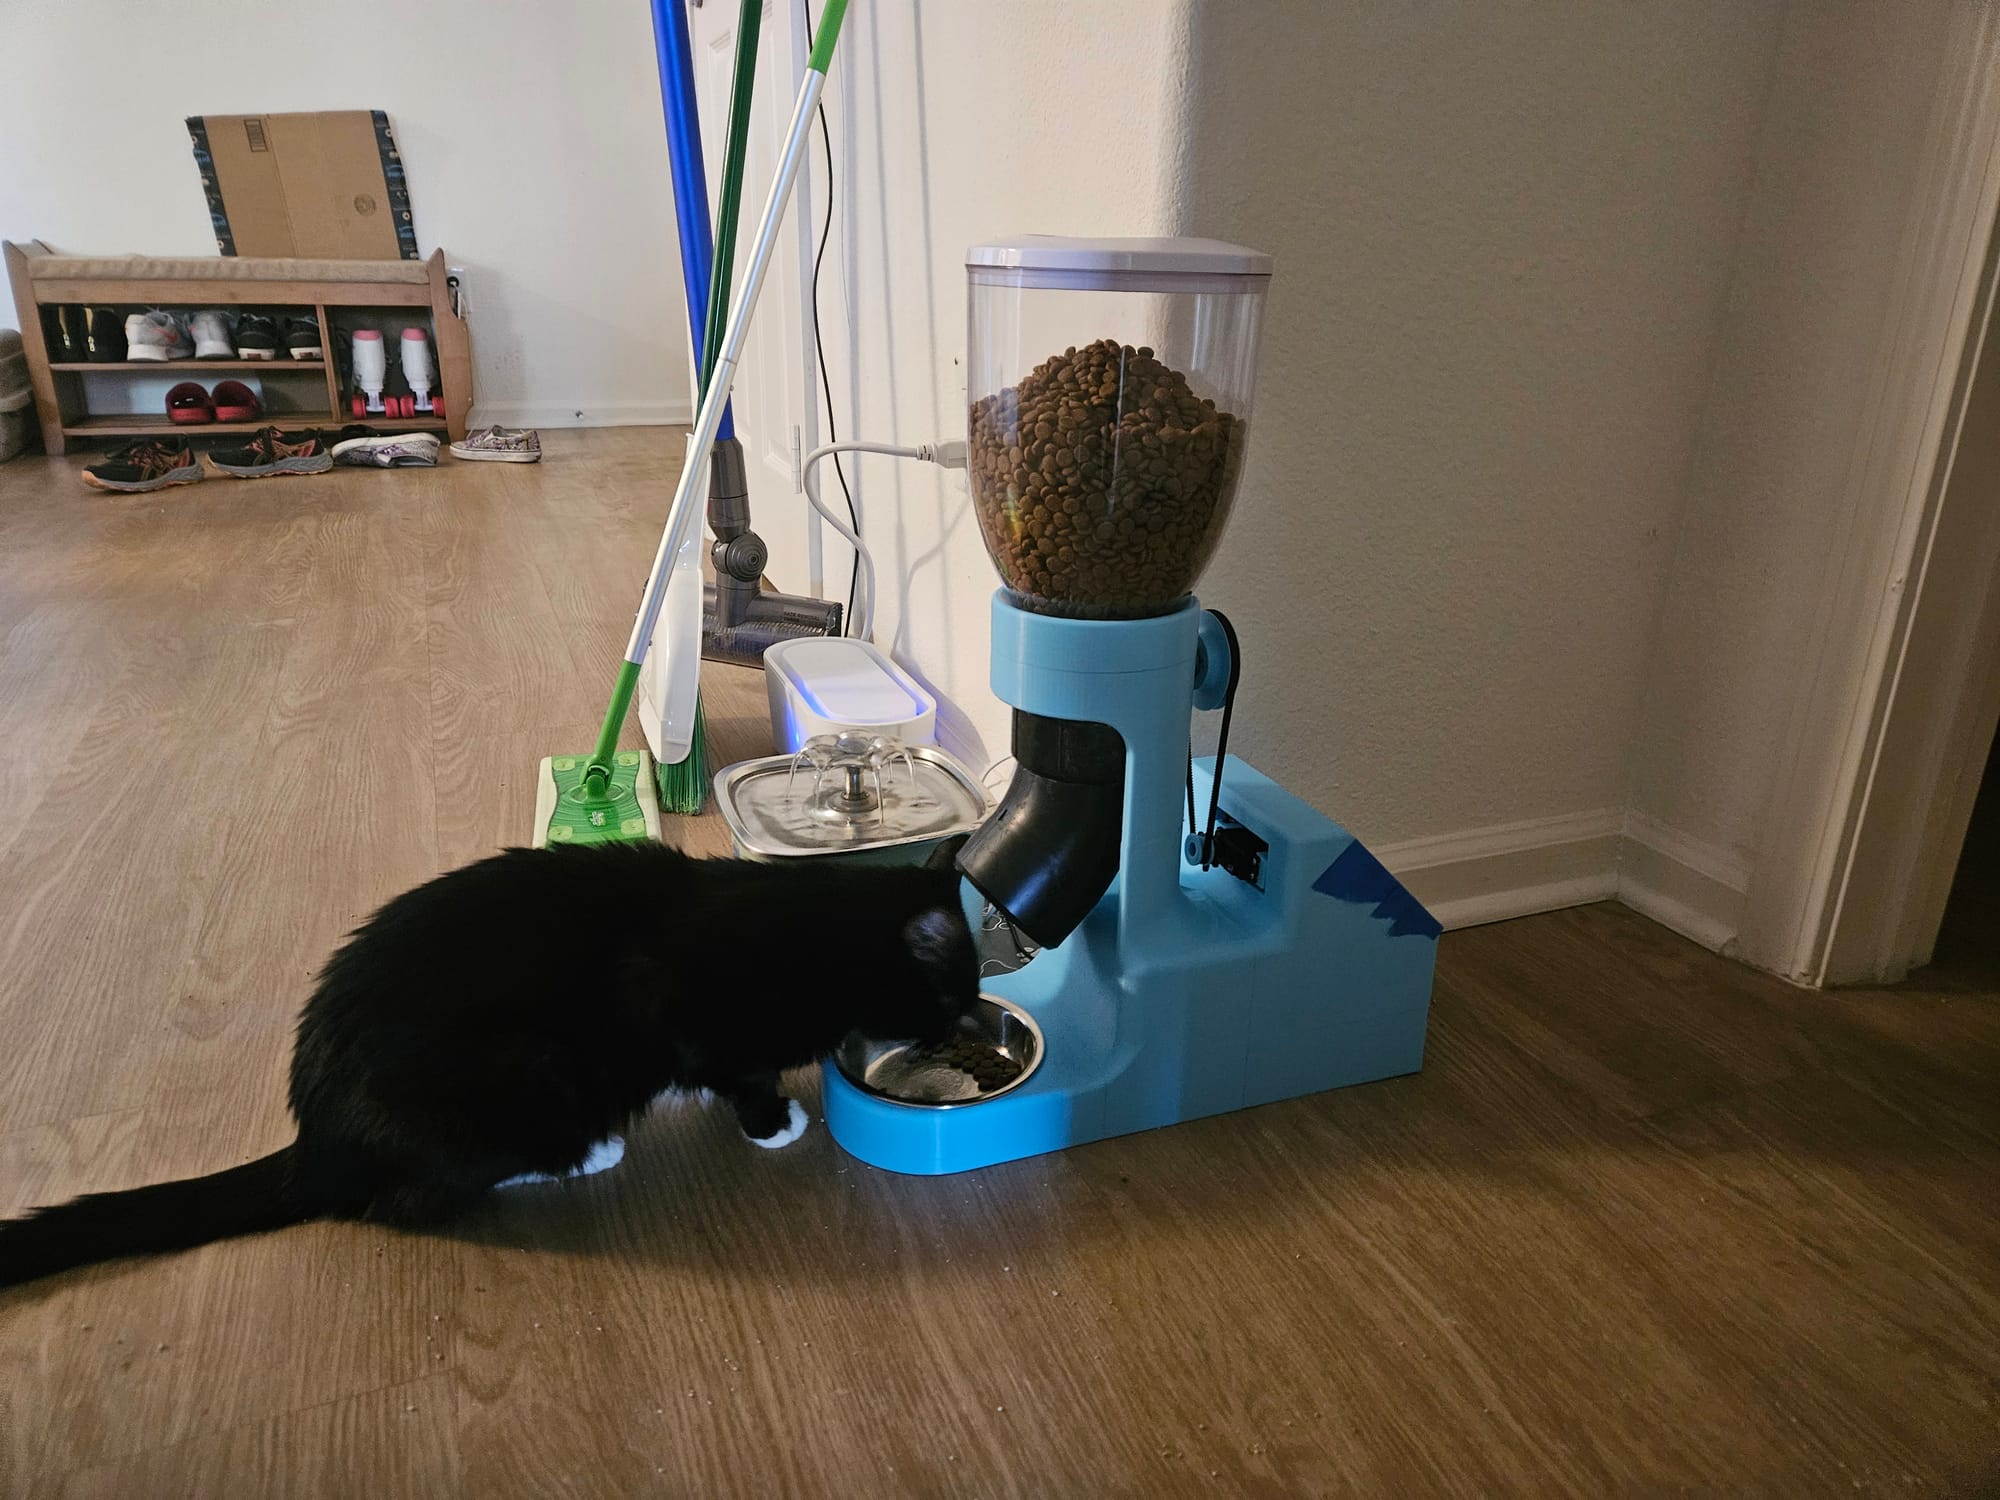
Hack off the knob on the dispenser, you will see you should be able to slot in the larger gear with the flat face lining up. This flat face inside is what allows the gear to move the knob without slipping. Once the gear is glued in place, the dispenser fits neatly into the feeder body as seen in the cover photo.
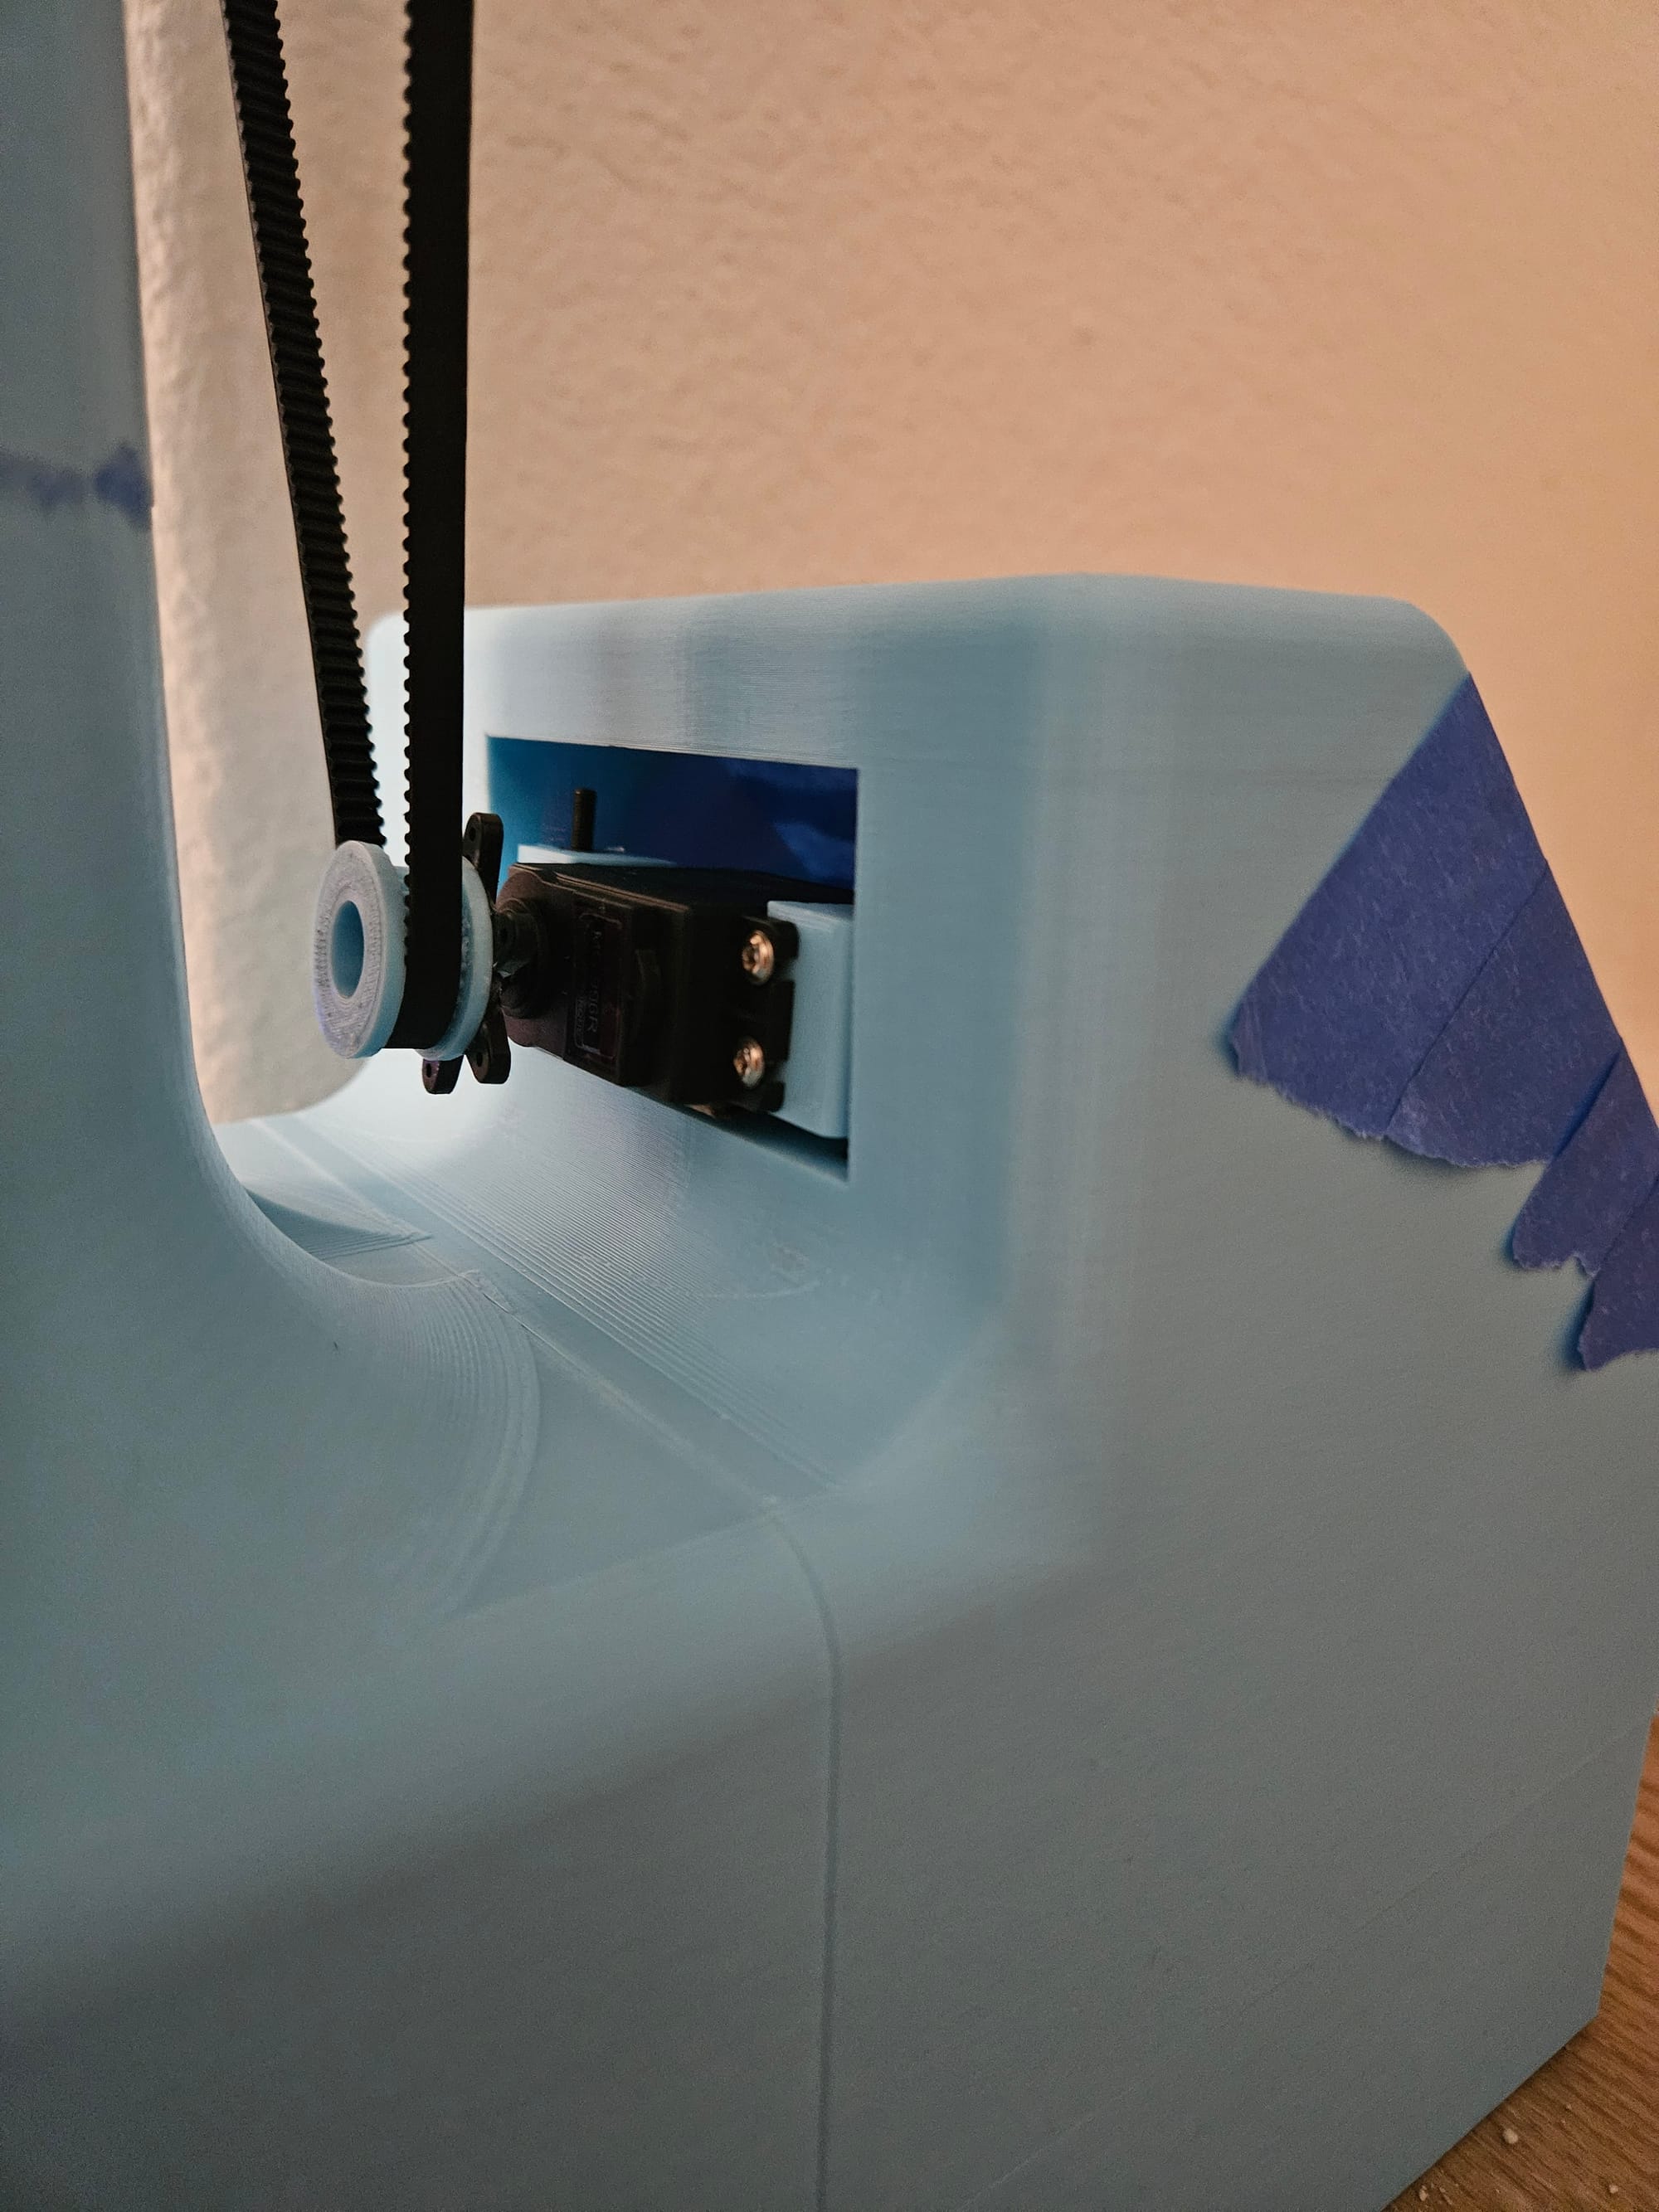
Glue the small gear to the horn of your servo motor. Screw your servo to your 2 servo mounts. Glue a small M3 nut in the hex shaped inserts in the servo mounts (4 nuts total).
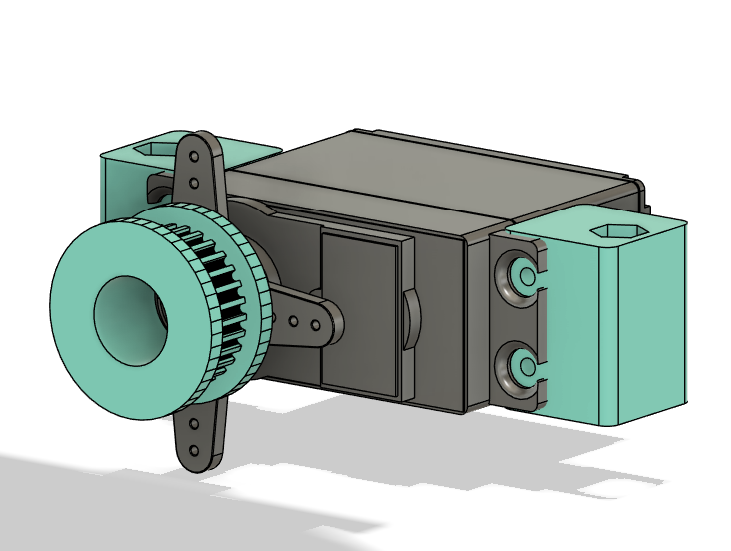
Stick the servo in the rectangular slot of the feeder body. Use 2 long (I used 45mm) M3 screws to secure it. There are holes in the bottom of the feeder body to access the screws from underneath. I needed the extension on my ifixit precision screwdriver in order to reach these.
Once the servo is mounted, add the appropriate size belt. Use the M3 screws from underneath to adjust the tension on the servo motor until the belt is tight. I also slipped a bit of cardboard under the servo to help keep it flat (the tension wants to pull it up at an angle).
- Assemble the electronics
Assemble your parts according to the following schematic:
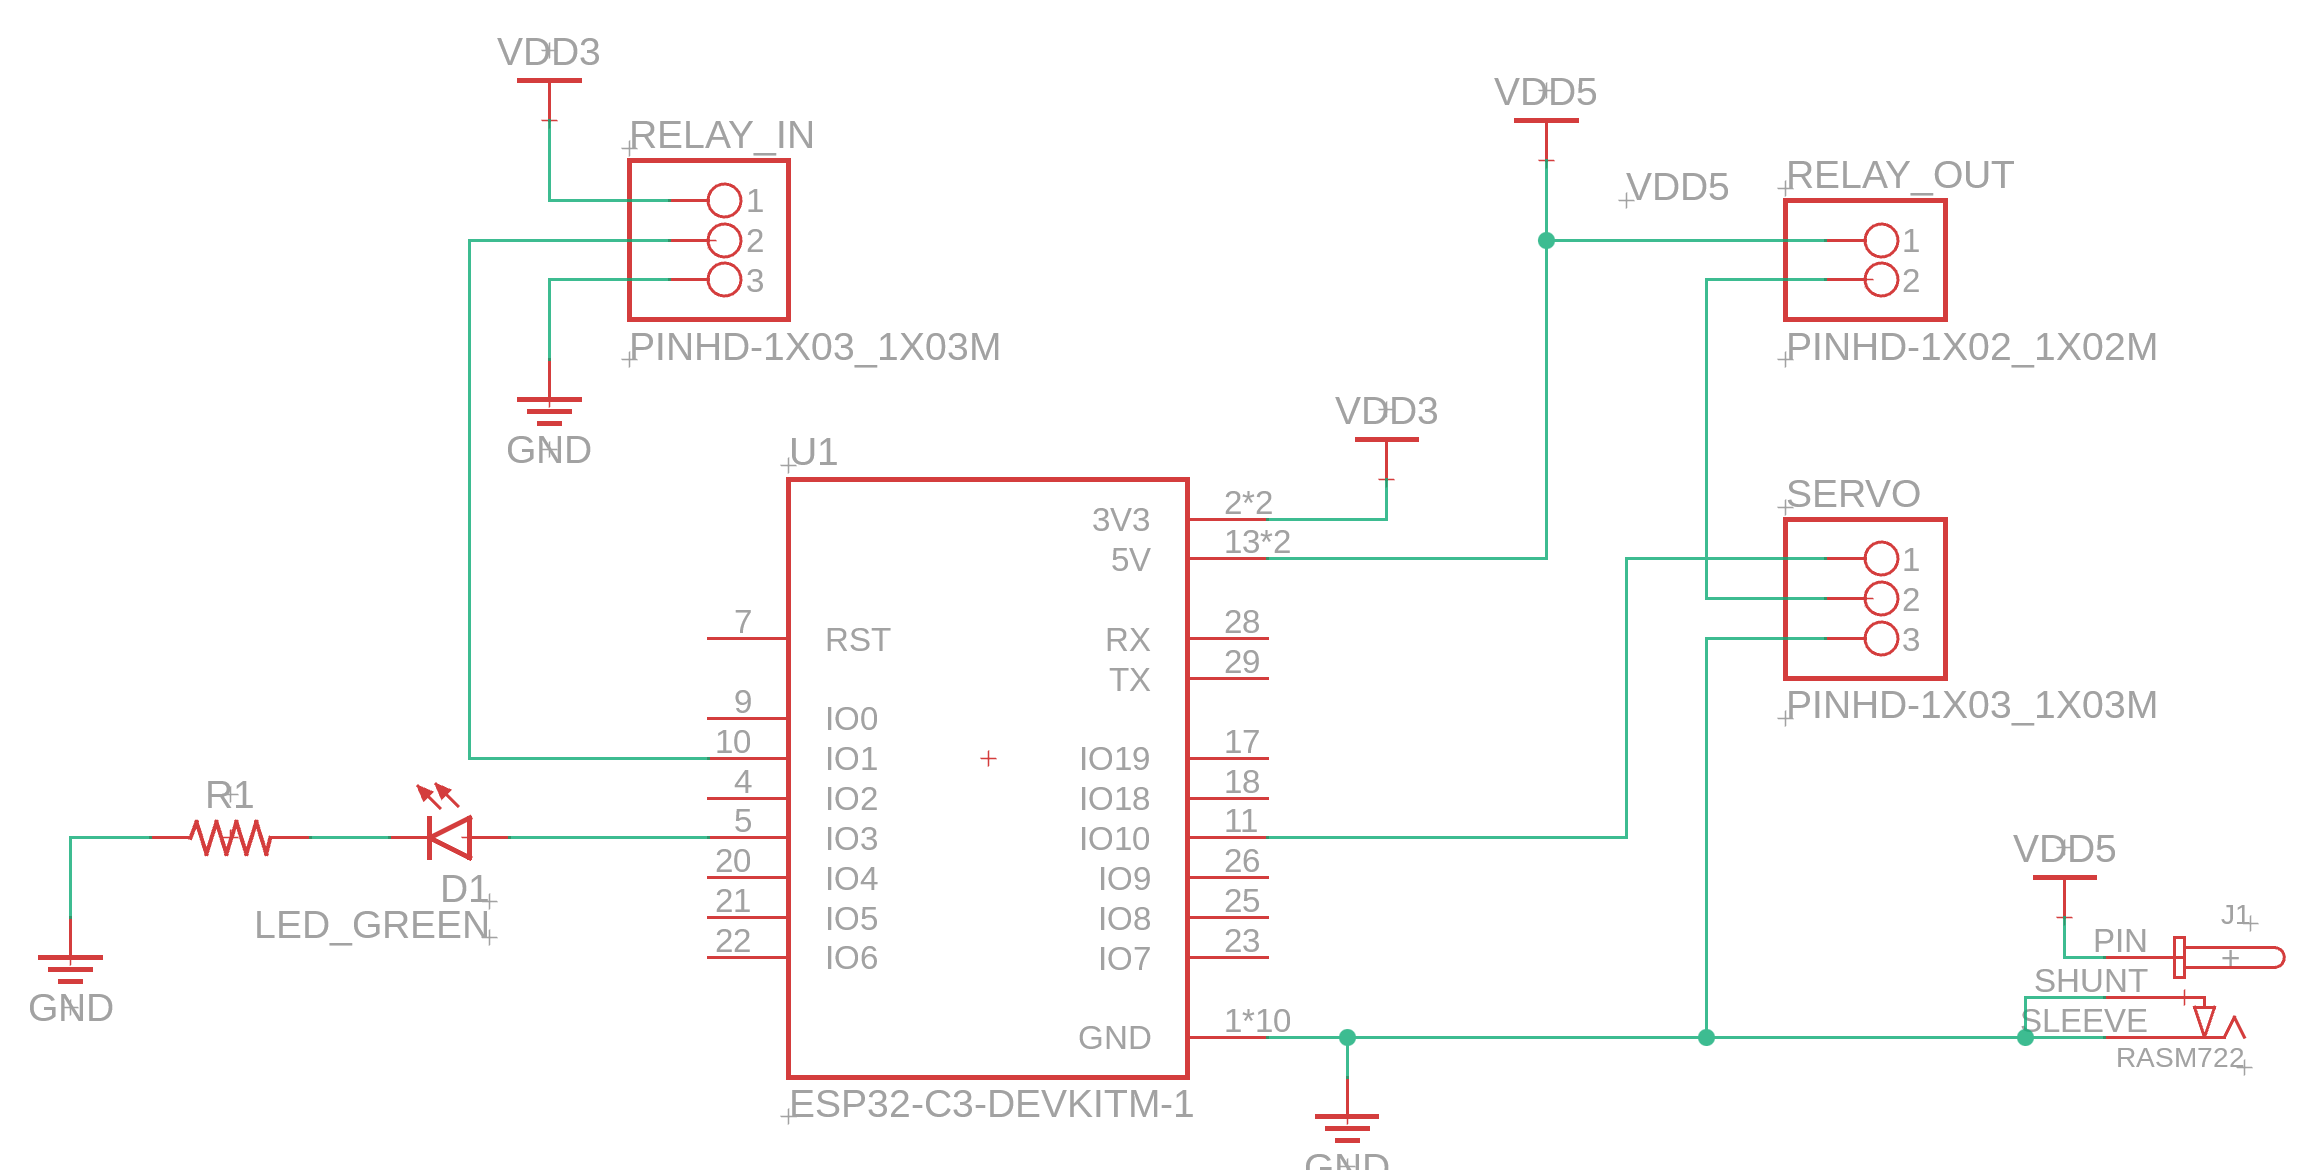
The "relay in" connects power, ground, and the control signal (IO1). Use the 3V output of the microcontroller for power in. The "relay out" will make/break the connection to servo power. Connect 5v power from your power supply (same one that connects to the barrel jack) to the COM port. Connect your servo's red wire to the "NO" port (normally open). By default, the servo will be unpowered, but when the relay is activated, it will connect the servo to power and allow it to turn.
I could just keep the motor powered, and use the control signal to turn it. But I found better results with a 360 degree servo motor and a relay. A egular servo can only move 180 degrees, which is not enough for the dispenser to actually dispense. And 360 degree servos cannot report position, so the control signal will tell it to start turning in 1 direction, but will not stop it. So the relay switching power to the motor, which just turns continuously, proved to be easiest.
I probably could've used a stepper motor or a high torque dc motor, but oh well, I used a servo. It works.
- Flash ESPHOME
This part of the guide assumes you have home assistant running with the ESPHOME add-on. Here is the YAML for the cat feeder:
esphome:
  name: cat_feeder
  friendly_name: cat_feeder

esp32:
  board: esp32-c3-devkitm-1
  framework:
    type: arduino

# Enable logging
logger:

# Enable Home Assistant API
api:
  encryption:
    key: "**********"
  services:
    - service: control_servo
      variables:
        level: float
      then:
        - servo.write:
            id: main_servo
            level: !lambda 'return level / 100.0;'
    - service: trigger_feed
      then:
        - switch.turn_on: relay_10
        - servo.write:
            id: main_servo
            level: !lambda 'return -1;'
        - delay: 2s
        - servo.write:
            id: main_servo
            level: !lambda 'return 1;'
        - switch.turn_off: relay_10


ota:
  - platform: esphome
    password: "********"

wifi:
  ssid: !secret wifi_ssid
  password: !secret wifi_password

  # Enable fallback hotspot (captive portal) in case wifi connection fails
  ap:
    ssid: "Cat-Feeder Fallback Hotspot"
    password: "YWOhzc77U3Vd"

captive_portal:

output:
  - platform: ledc
    id: my_led
    pin: GPIO3
  - platform: ledc
    id: servo_10
    pin: GPIO10
    frequency: 50 Hz

switch:
  - platform: gpio
    pin: GPIO1
    name: "servo relay"
    id: relay_10

servo:
  - id: main_servo
    output: servo_10

light:
  - platform: monochromatic
    name: "test led"
    output: my_led
The code is simple. When the service "trigger feed" is called from HA, it will turn on the relay, move the servo, wait 2 seconds, then shut off the relay. The code also includes an LED. I used this during testing to make sure home assistant could connect and control the esp32.
Once you have flashed the code above to your ESP32, you will want to create a helper "input button"

On your dashboard, add a button card with the following settings:

Now, when you push that button, it will call the service "trigger feed" as explained above.
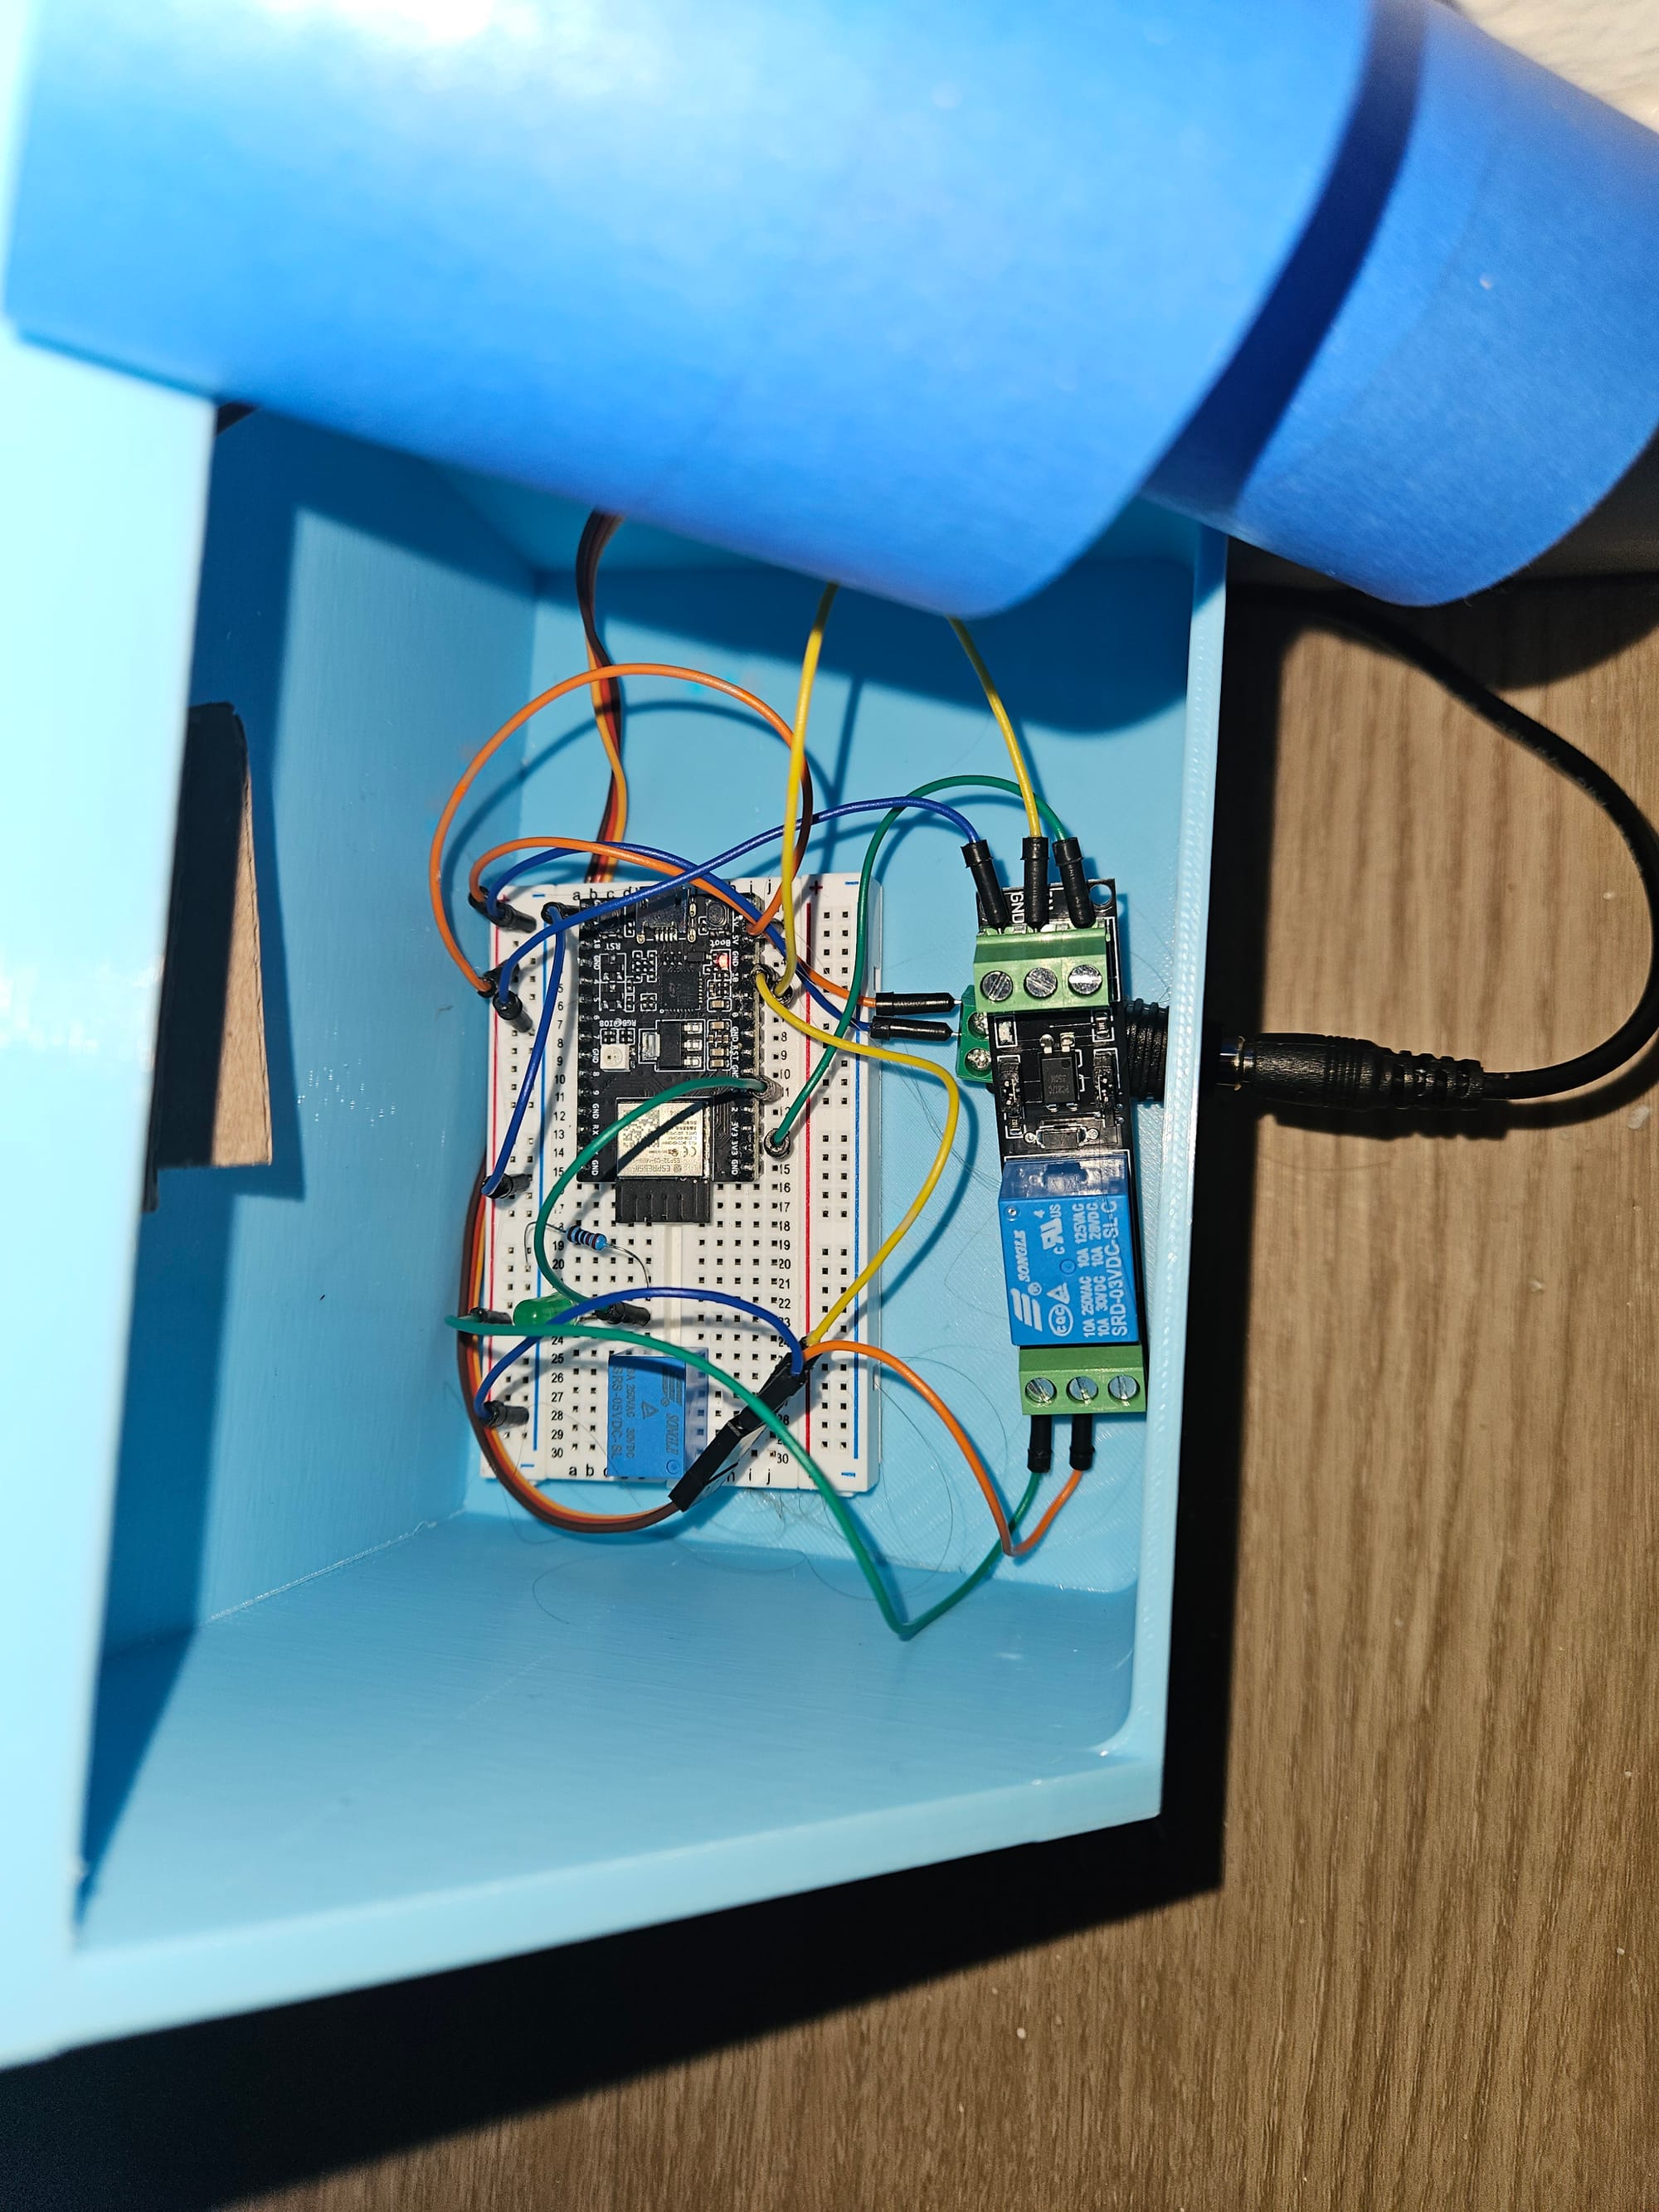
- Install electronics
Add the electronics in the back compartment of the feeder as pictured:
Screw on the lid (not pictured) and you're done! Add some food, press the button, and watch your cat enjoy a tasty meal!
You can even create an automation in home assistant to dispense food at a certain time every day!